


.jpg)
.png)
.png)


How to create a funnel diagram quickly
And although they might look tricky to draw, you can very quickly convert a SmartArt into a funnel in a few steps. The video below walks you through how to do this - and see the step-by-step guide below. You’ll use two functionalities you may not have used before: Convert to Shape and Edit Points.
Step 1: Insert a pyramid SmartArt
We don’t usually recommend using SmartArt. But in this case, we are going to use the SmartArt Inverted Pyramid as a base then customise it. Before you start, determine how many steps there are in your process.
Go to Insert > SmartArt
Choose Pyramid from the list on the left, then Inverted Pyramid.
Step 2: Configure the layers
You will need one layer for each stage in your process, plus one extra - you’ll see why in a moment.
Use the text pane to add lines to the bulleted list. If the text pane isn’t showing, turn it on in the SmartArt Design tab.
You can label the steps here if you want to, or label them later.
For the extra layer – which is the point at the bottom of the pyramid – just type a space, as this doesn’t need any text on it.
Step 3: Convert to a shape
Now that we’ve used the SmartArt to create the layers, we can dispense with the ‘smart’ aspect. We’ll turn the drawing into normal shapes that we can then edit.
Select the SmartArt
On the SmartArt Design tab, click Convert > Convert to Shapes. (Or you could use Ctrl+Shift+G/Cmd+Option+Shift+G to Ungroup, which achieves the same thing.)
Step 4: Turn it into a funnel
The last step is to tweak the bottom triangle to be the nozzle of the funnel. This uses the hidden-away Edit Points function. You can actually use this on any shape when it doesn’t quite meet your needs.
Select the bottom triangle.
Right-click and select Edit Points.
Select the lowest point and drag it down to stretch the triangle into more of a nozzle shape. This will reveal another edit point underneath.
Select the other bottom edit point and drag that down. Move them both until you have a funnel shape.
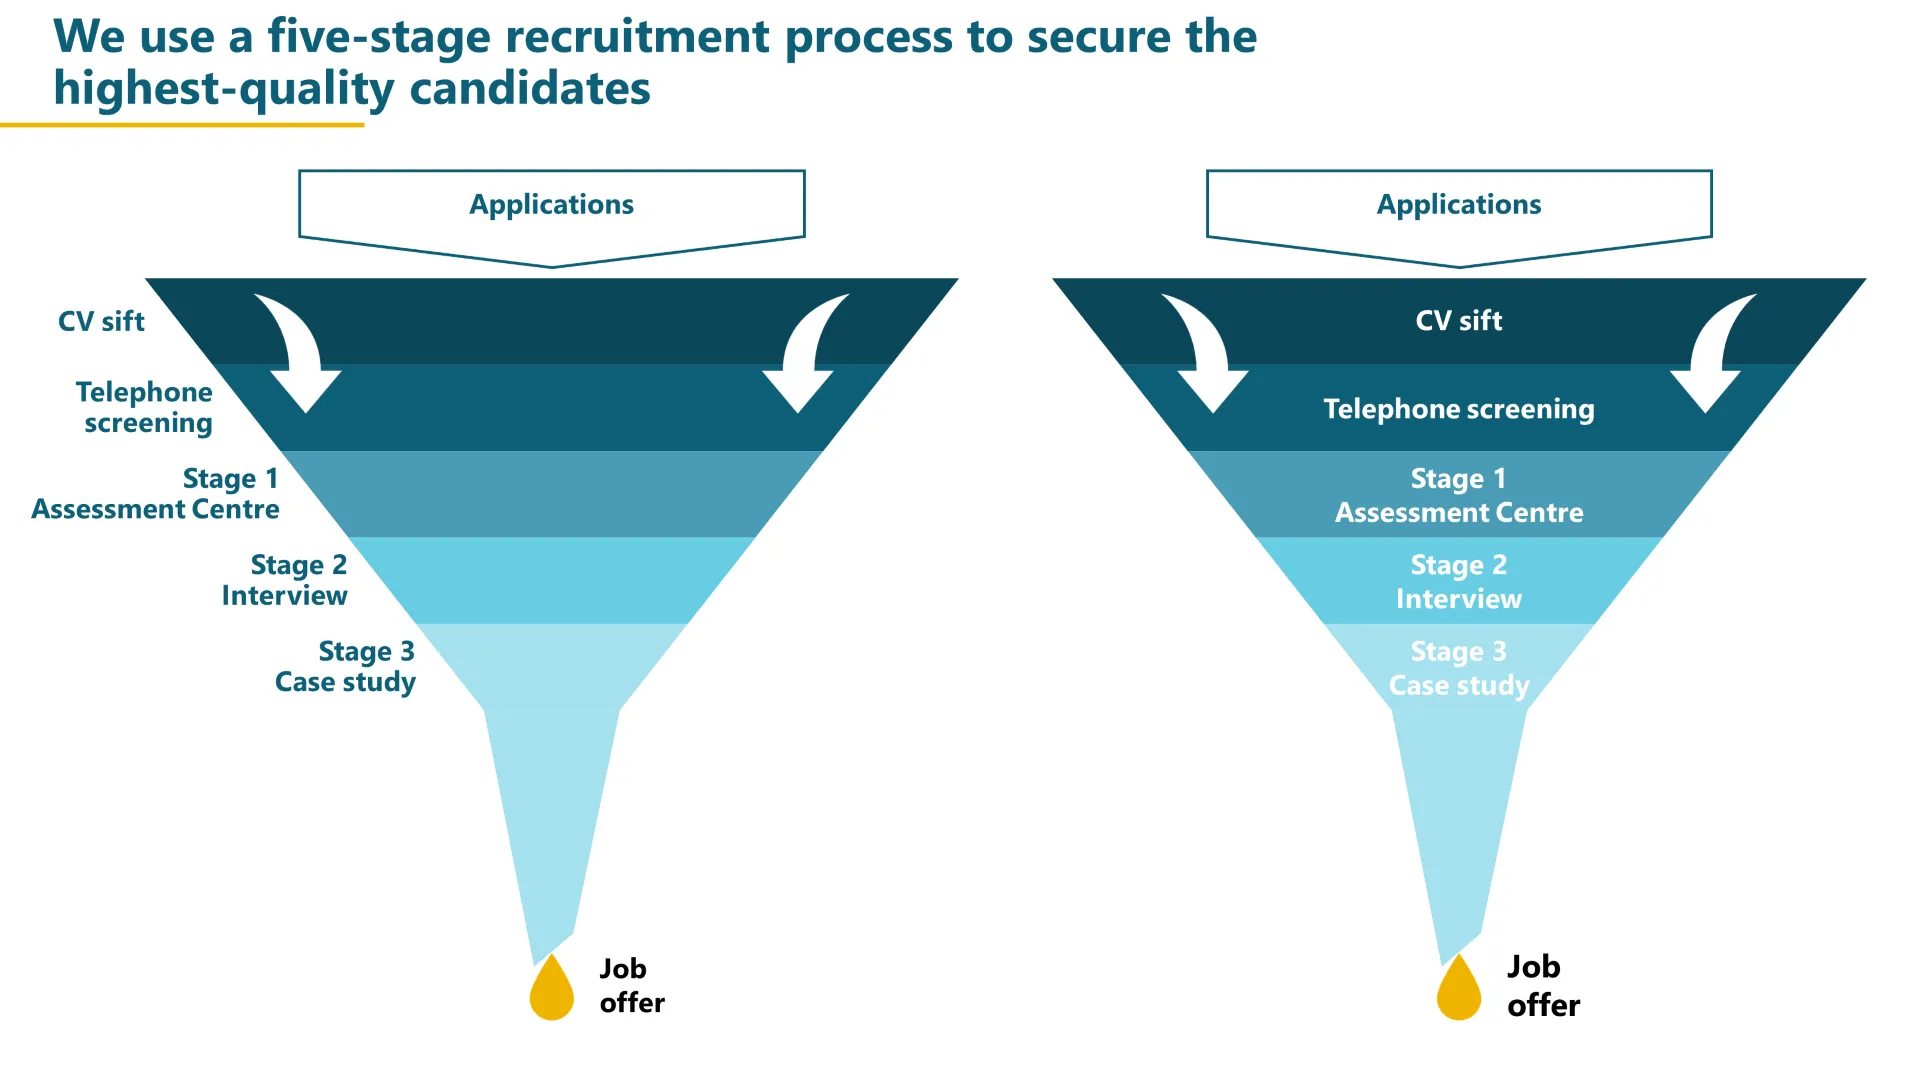
You could either have a horizontal funnel, or use an approximate 45° angle. We think the angle looks better and is also easier to draw, since you have to do this by eye – so achieving a perfect horizontal bottom edge is tricky. Whereas no one is going to question the angle you choose.
Finish up: format and label it
Now you can resize and colour the funnel as you need, and decide how to label each layer. We often use separate text boxes to one side, so you don’t have to deal with the issue of the layers getting narrower.
If your labels do fit inside the funnel, then check the font size – SmartArt will have automatically scaled the text to fit, and it might end up at a size that doesn’t match your document. You might also need to get rid of the text margins that SmartArt calculated.
If you want to draw attention to the flow, you could add some arrows. The arrows in the Microsoft icon set work well for this. (Insert > Icons > type ‘arrows’)
You can even add a droplet of liquid coming out of the bottom of the funnel and label with whatever the end result of the process is. Again, there's a great inbuilt icon for this. Just search for 'drop'.
Want more tips like this in your inbox?
It's useful*
It doesn't flood your inbox (monthly-ish).


