


.jpg)
.png)
.png)
Six ways to save time in PowerPoint
PowerPoint can feel frustrating and time-consuming, and if you are trying to improve your PowerPoint game, it does mean putting in some extra effort. But there are a few simple things you can do to speed up some of the more mundane tasks. So you have more bandwidth to focus on high-quality, impactful content.
We’ve pulled together the top tips and tools that we use time and time again.
1. Learn some keyboard shortcuts
A few keyboard shortcuts can make a massive difference: if you don’t even need to use the mouse to locate that command button, it’s already saved you time. Some of our favourites include:
CTRL+Y to redo the last action
CTRL+D to duplicate and object (quicker than CTRL+C, CTRL+V)
SHIFT+F3 to toggle between lower case, UPPER CASE and Sentence Case. Great for when you need to quickly capitalise a word instead of going to the front, deleting one letter and re-typing it.
CTRL+Mouse wheel to zoom in and out on a slide. If you select an object first, it centres on that while zooming.
Ctrl+V, then Ctrl, then T to paste in plain text
Download our PDF with all our recommended top shortcuts –– including how to use your keyboard to power-up your mouse. Windows and Mac versions available.
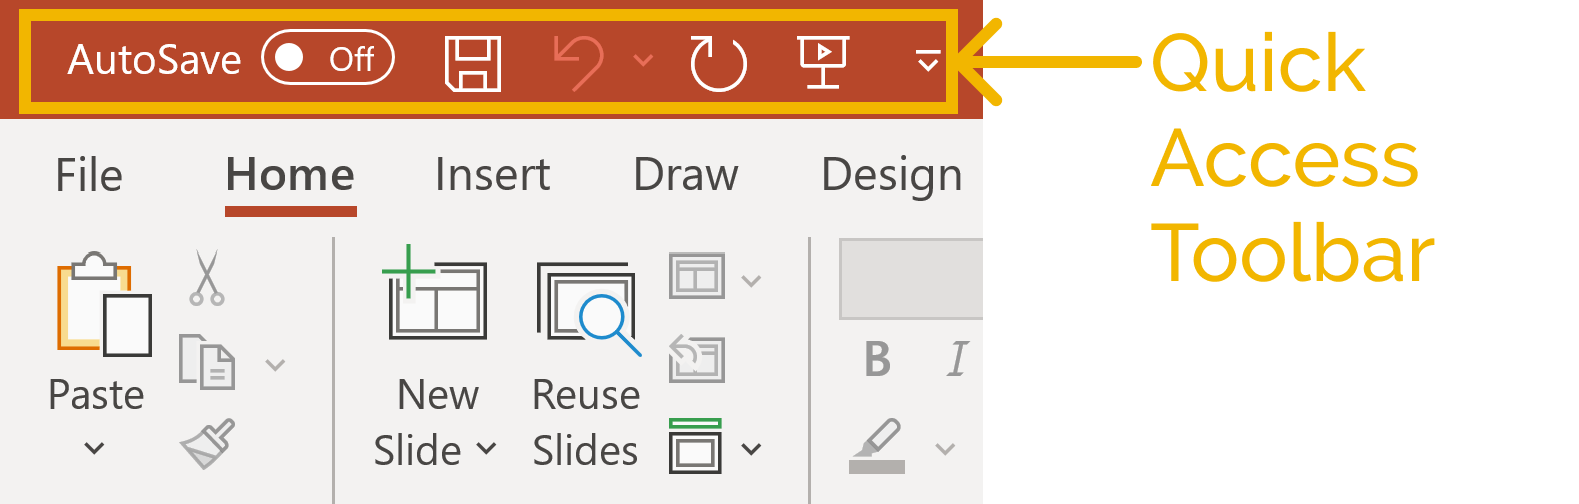
2. Use the Quick Access Toolbar
Many people don’t even notice the Quick Access Toolbar (QAT) lurking in the top right.
Even more don't realise that with just a little customisation it becomes incredibly useful, for two key reasons:
You can put all of your favourite and most-used commands on it
It’s always visible, regardless of which ribbon tab you are using
And to make the quick access even quicker: move it to below the ribbon (right-click and choose Show QAT Below the Ribbon...'). It becomes bigger to give you room for more commands, and easier to reach right above your slide. You can add and remove the commands you do or don’t need: just right-click on a command and choose Add to Quick Access Toolbar.
To get you started, we’ve put together a QAT that you can download and import in a few seconds. Then add the commands that you use most often.
For more about super-charging the Quick Access Toolbar, read this article.
3. Double-click the Format Painter

The format painter is great, but did you know that if you double-click the button, you can paste the formatting to multiple objects:
Select the object or text to copy the formatting from
Double-click the Format Painter paintbrush icon
Click on each target object or text in turn
Press Escape or click the Format Painter icon again when you’re finished.
Did you also know that you can use keyboard shortcuts: CTRL+SHIFT+C to copy formatting and CTRL+SHIFT+V to paste it. (CMD+SHIFT on macOS.) This method has the advantage of remembering the formatting while you do other tasks in between.
4. Set default formats
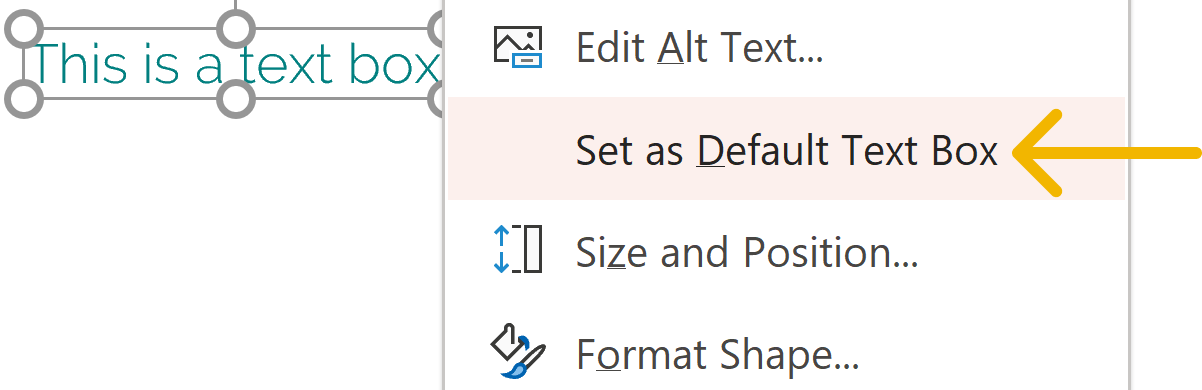
To save having to keep copying formats every time you create a new shape or text box, you can set the default format. Then every new shape, line or text box you create will start out how you want.
Draw a text box (or shape or line)
Format it as you want
Right-click and select Set as Default Text Box (or shape, or line)
This is now set, for the slide deck you are currently working in.
5. Quick preview of animations & transitions
If you want to preview animations or slide transitions, you probably put the deck into Slide Show mode. Or perhaps you go to the Animations tab, open the Animations pane and press Play All.
There’s a much simpler way, without leaving the view you are currently in. In the Slide Sorter down the left, any slide with an animation or transition effect will have a small star under the slide number. Just click the little star to preview the animation right there.

Particularly useful if you are building a Morph transition.
6. Use the BrightSlide Add-in
Created by BrightCarbon, their free add-in is absolutely packed with features that we wish PowerPoint came with. Many of these are fantastic time savers – like Match Size and Swap Objects.
Download the BrightSlide Add-In and try it for yourself.
And if you find yourself using any of the BrightSlide add-in commands a lot, do yourself a favour: right-click and add them to your Quick Access Toolbar.
Want to go further?
If you want to find out even more ways of improving your PowerPoint productivity, alongside techniques for raising the quality of your decks, we provide advanced training and PowerPoint coaching. Get in contact to find out more.
And if you didn’t download it yet, here is our keyboard shortcut guide:
Want more tips like this in your inbox?
It's useful*
It doesn't flood your inbox (monthly-ish).


