How to fade a photo edge into the background in PowerPoint
I like to use images full-bleed – i.e. edge-to-edge as if they are part of the slide background. And sometimes, I need the images to blend into the background, usually for one of these reasons:
I’ve used GenAI to create an image on a specific background colour (usually white) but it didn’t quite listen to me, so when I place the image, the edge is visible.
I need to overlap some text onto part of the image, and while I want the image to be visible, I also need enough contrast for the text to be legible
I’ve just decided it would look better in this context. More of a gut feel.
While you can’t make the image itself blend, there is a simple way to achieve the same effect in PowerPoint.
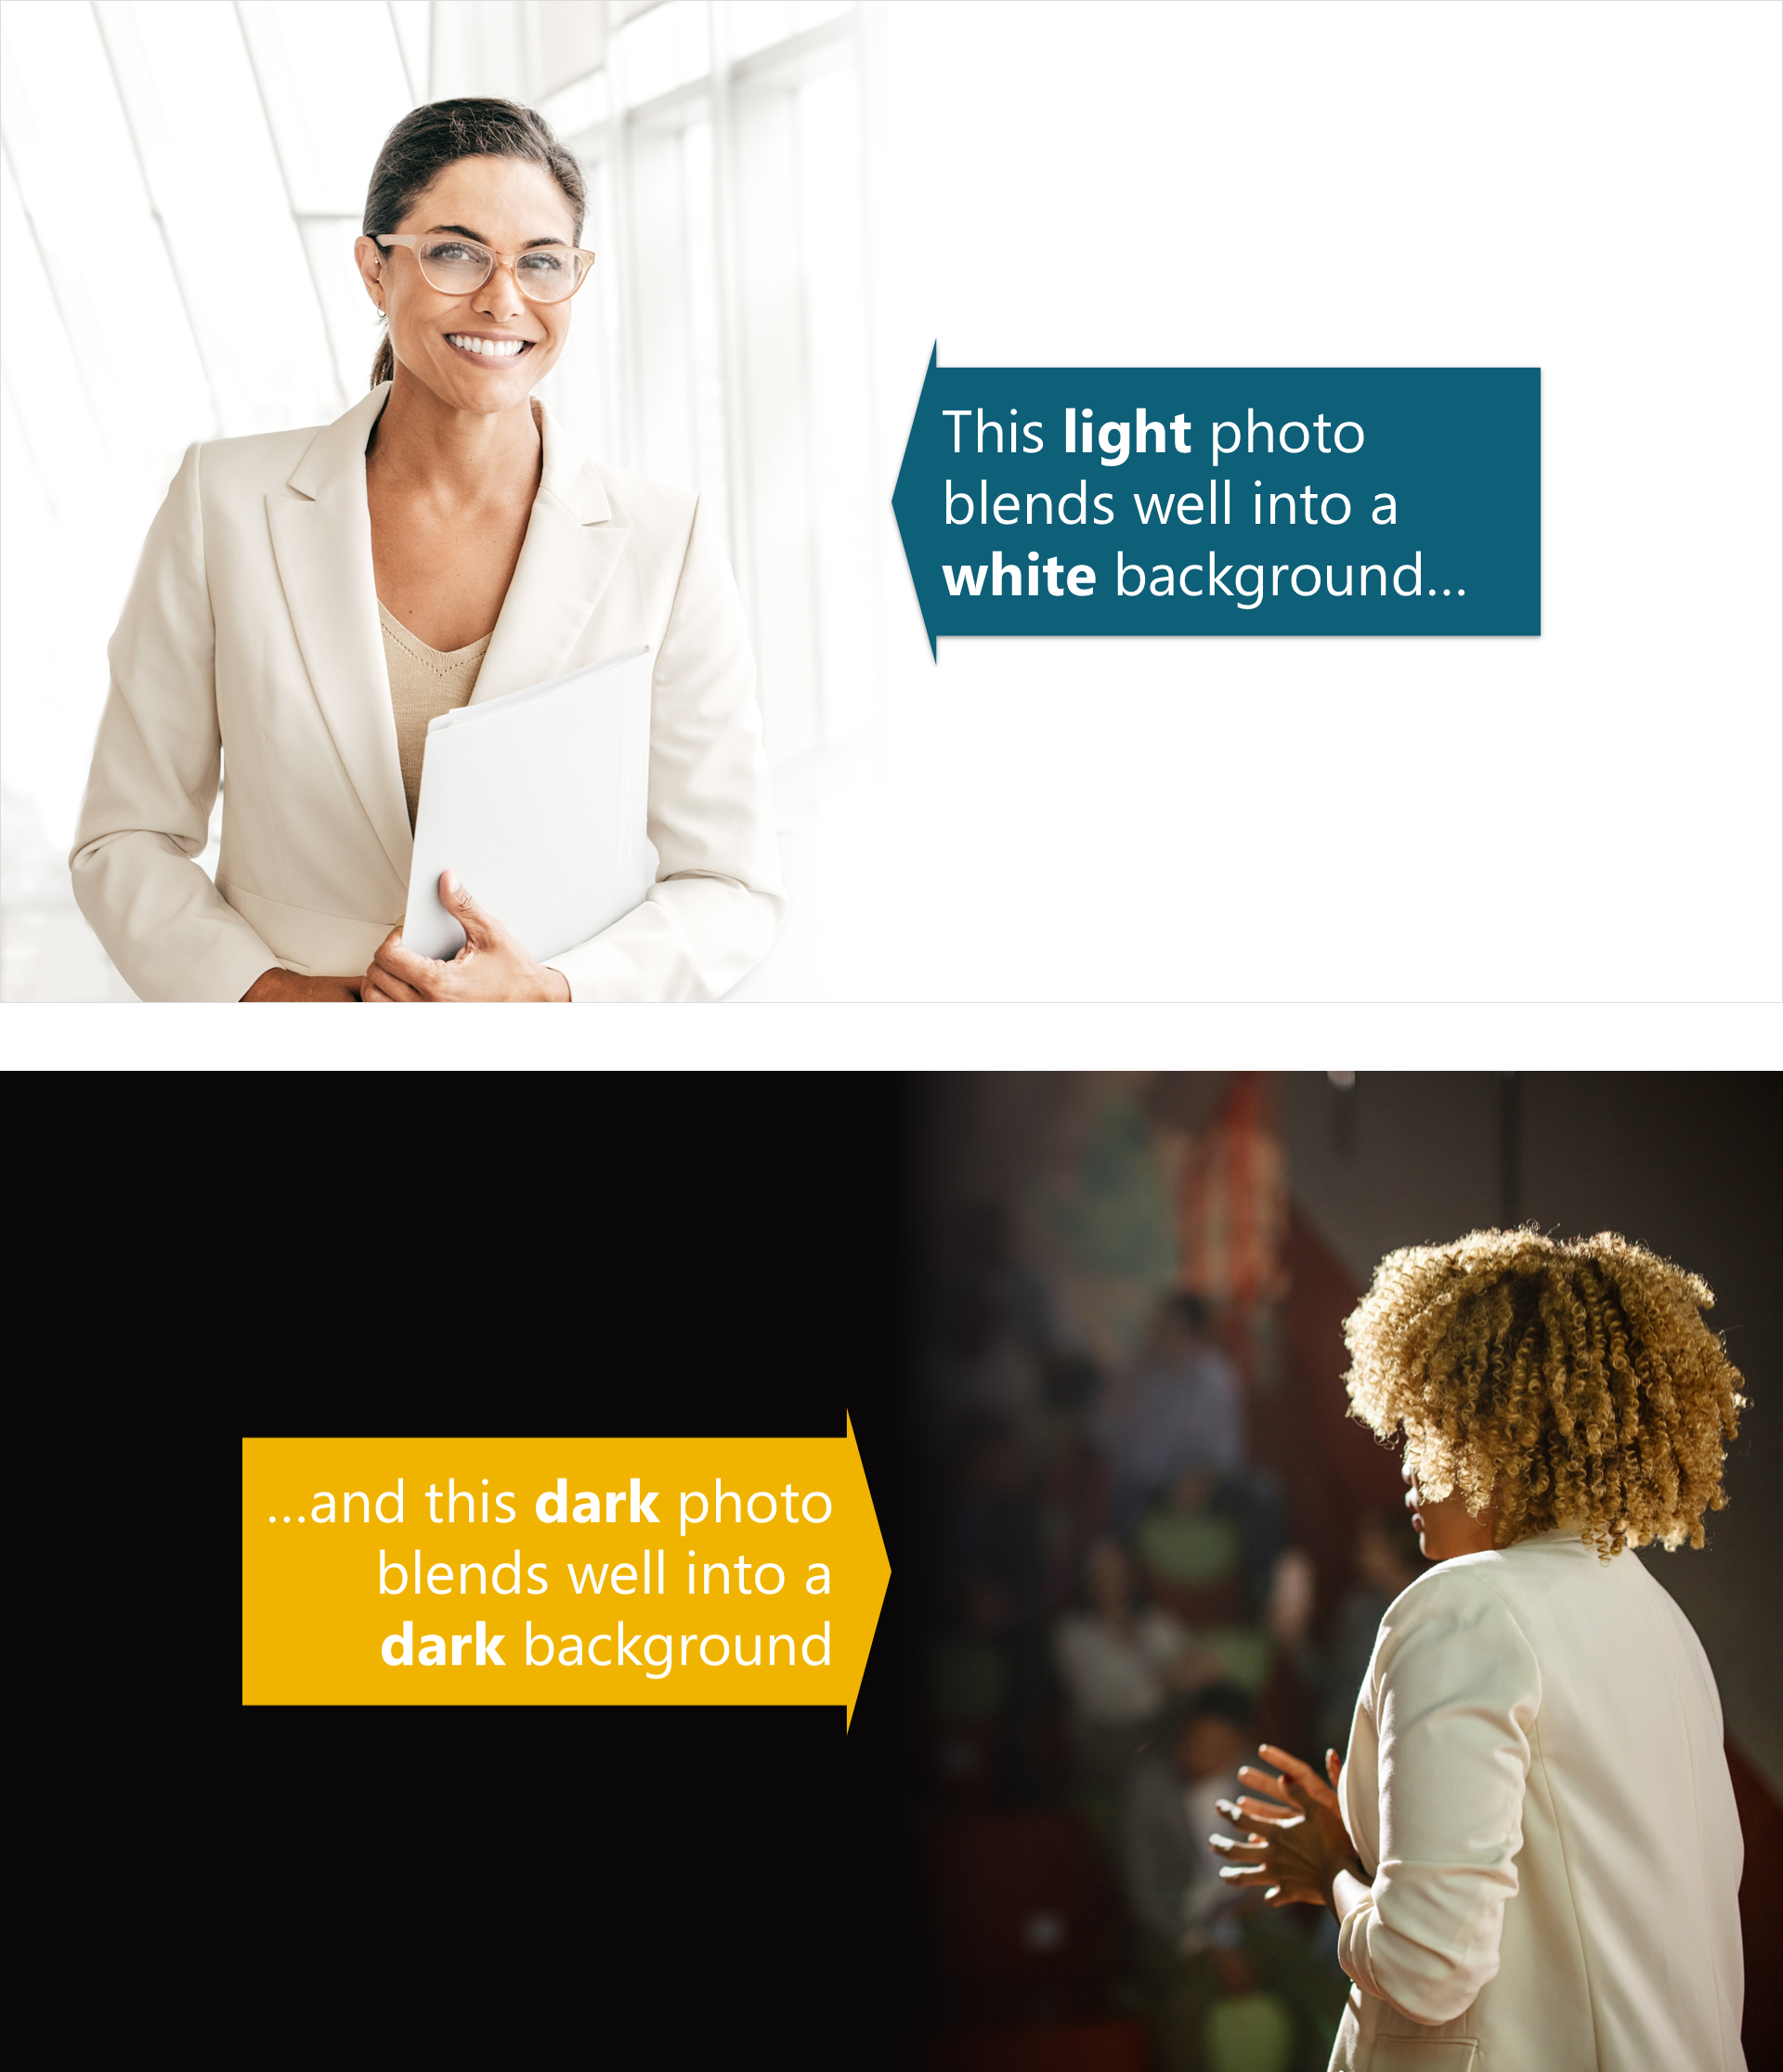
Before I explain how, it’s important to know that this only works well if the photo background is not that different to the slide background. So pale photos blend well into white slides, and dark photos blend well into dark backgrounds.
If you have a strong contrast between the photo and the background, the blend will be quite extreme. At best it is distracting, at worst it looks, well, bad.
So either pick your image carefully or change your background to more closely match the image.
How to blend the image
There is no great secret: simply place a box on top of the image and then use a gradient fill that goes from coloured to transparent to create the blend effect. The trick is in using the Transparency setting in the gradient options. Like this:
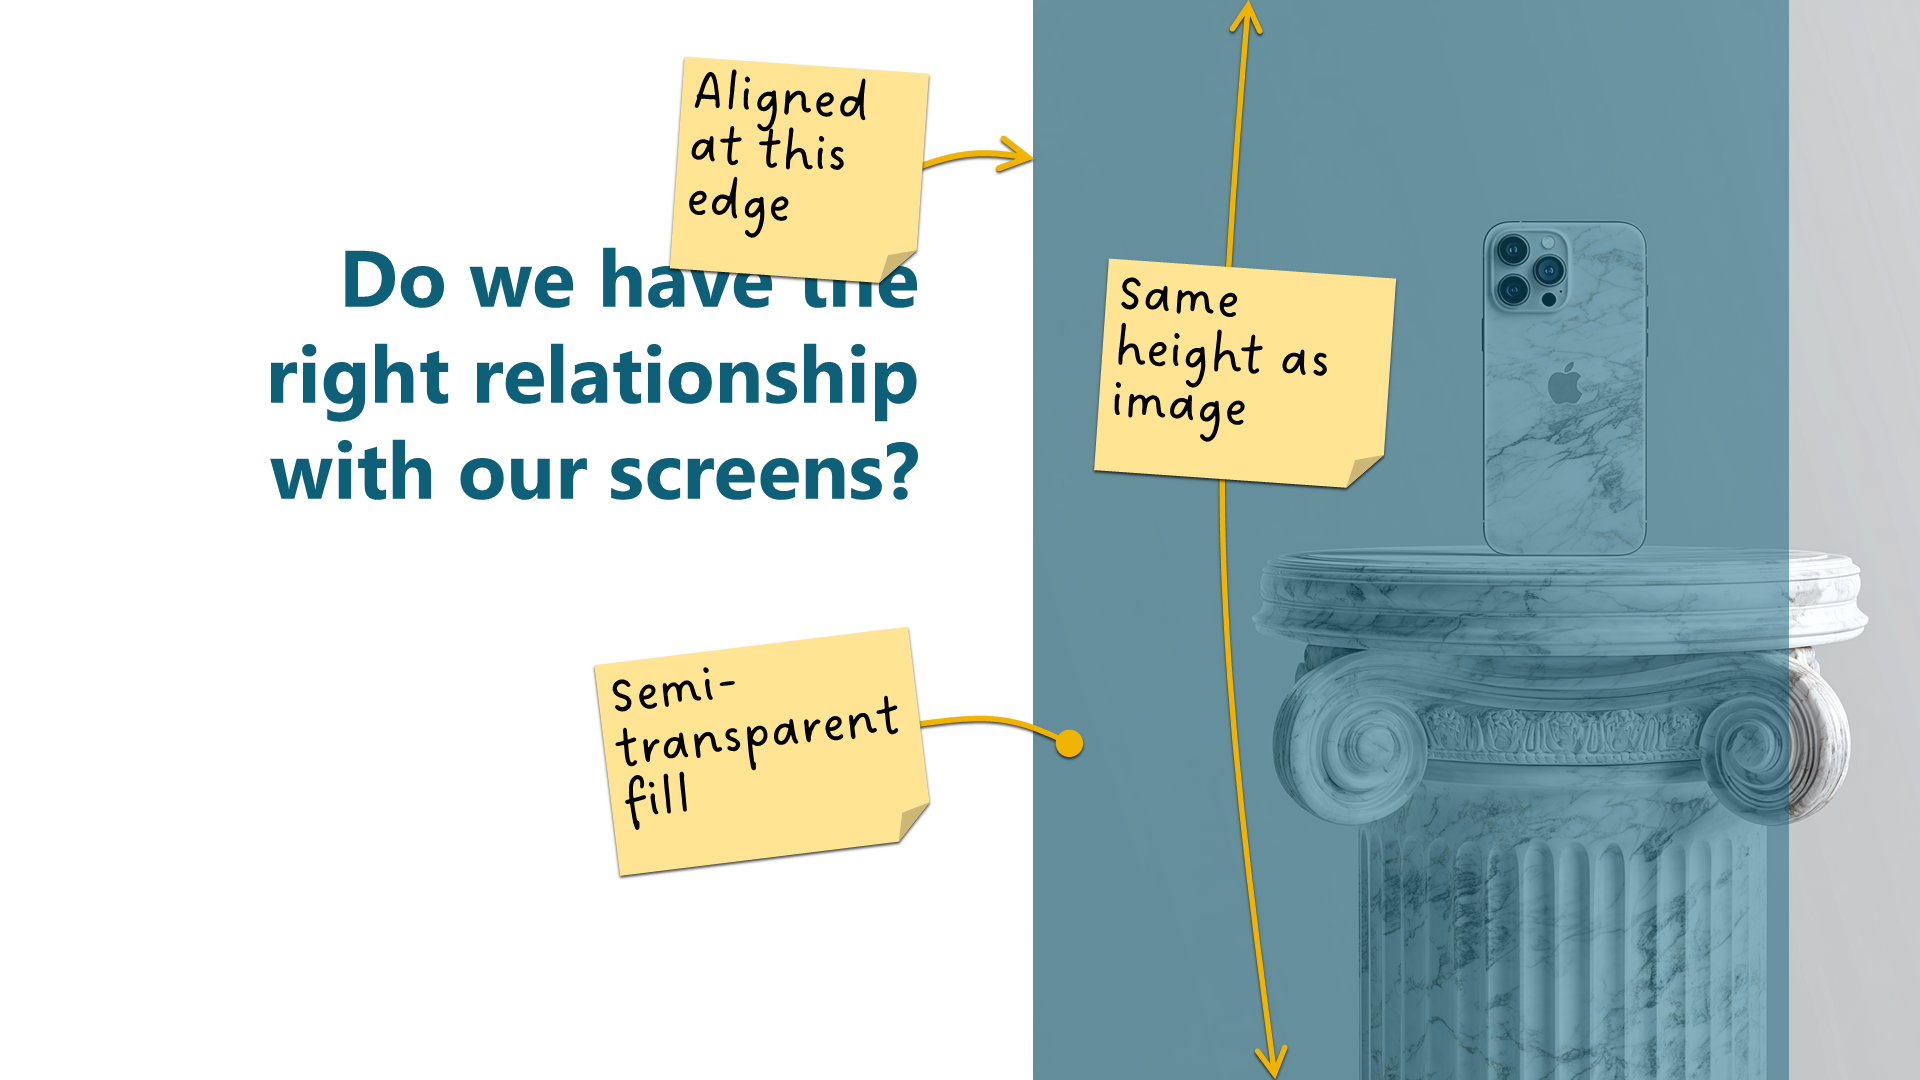
Step 1: Add a rectangle on top of the photo
Draw a rectangle.
Fill it with any colour you like. I also recommend making it partially transparent – this helps you to position it in the next step. Remove any outline colour.
Set it to be the same height as the image (or width if your blend is going the other way).
Align it with the edge of the photo. I recommend using the alignment tools to be sure. This is where the transparency helps you see that it is lined up.
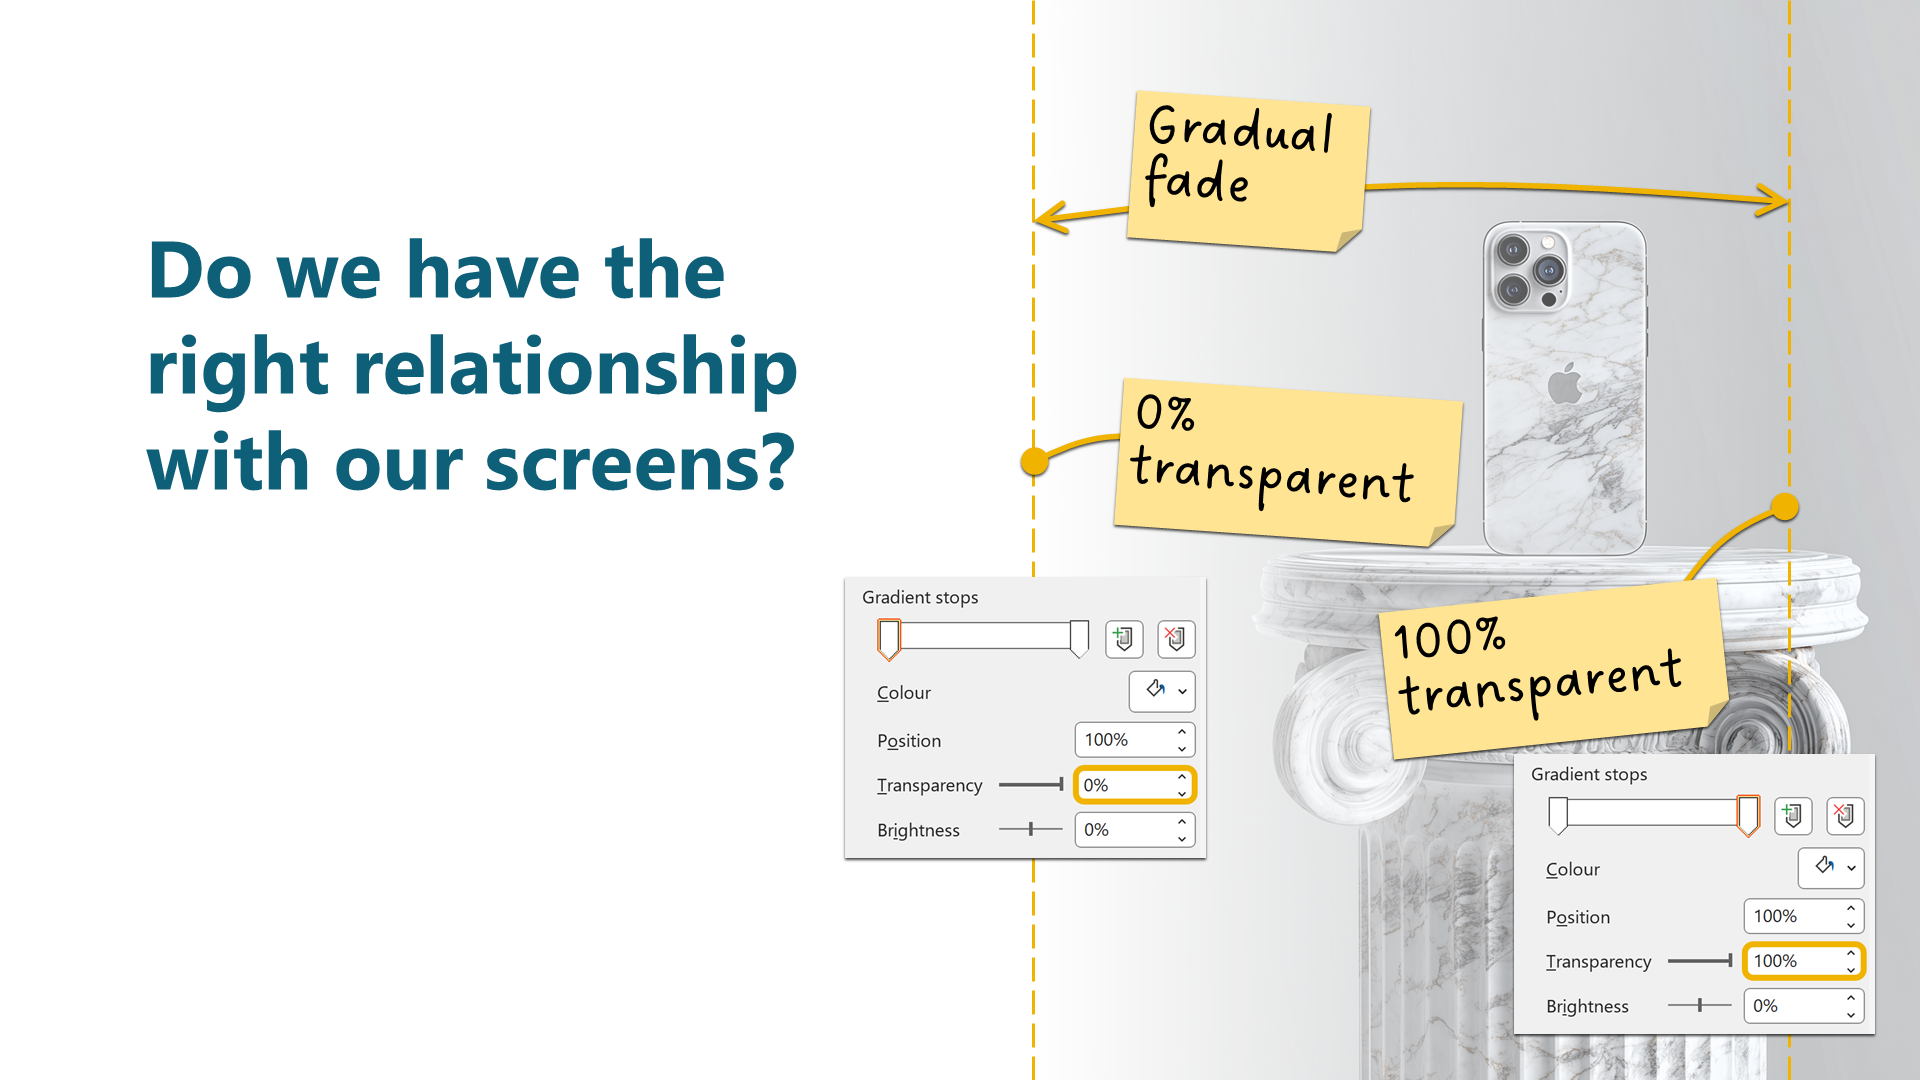
Step 2: Add a gradient fill to create the blend
Change the fill of your box to be a gradient:
Right-click > Format Shape > Fill > Gradient fill
This will add some kind of gradient, depending on your template settings and also the last gradient you may have used. It doesn’t matter which one is added, because we will adapt it to our needs in the next steps:
If there are more than 2 gradient stops, delete any extra ones.
Make sure the first gradient stop is at 0 and the second stop is at 100, so drag them left and right as needed.
Click on the first stop (so it is highlighted), then directly underneath that select the colour to be the same as the background that you are fading it into.
Click on the second stop, and set it to the same colour.
Now with the second stop still selected, change the transparency slider to 100%.
Use the Directiondropdown to make the blend go the correct way. (If you are using white, the options will all look the same, so hover over to find the one you need, which is usually Linear left or Linear right. Or Up and Down if your fade goes top-to-bottom. Trial and error if need be.)
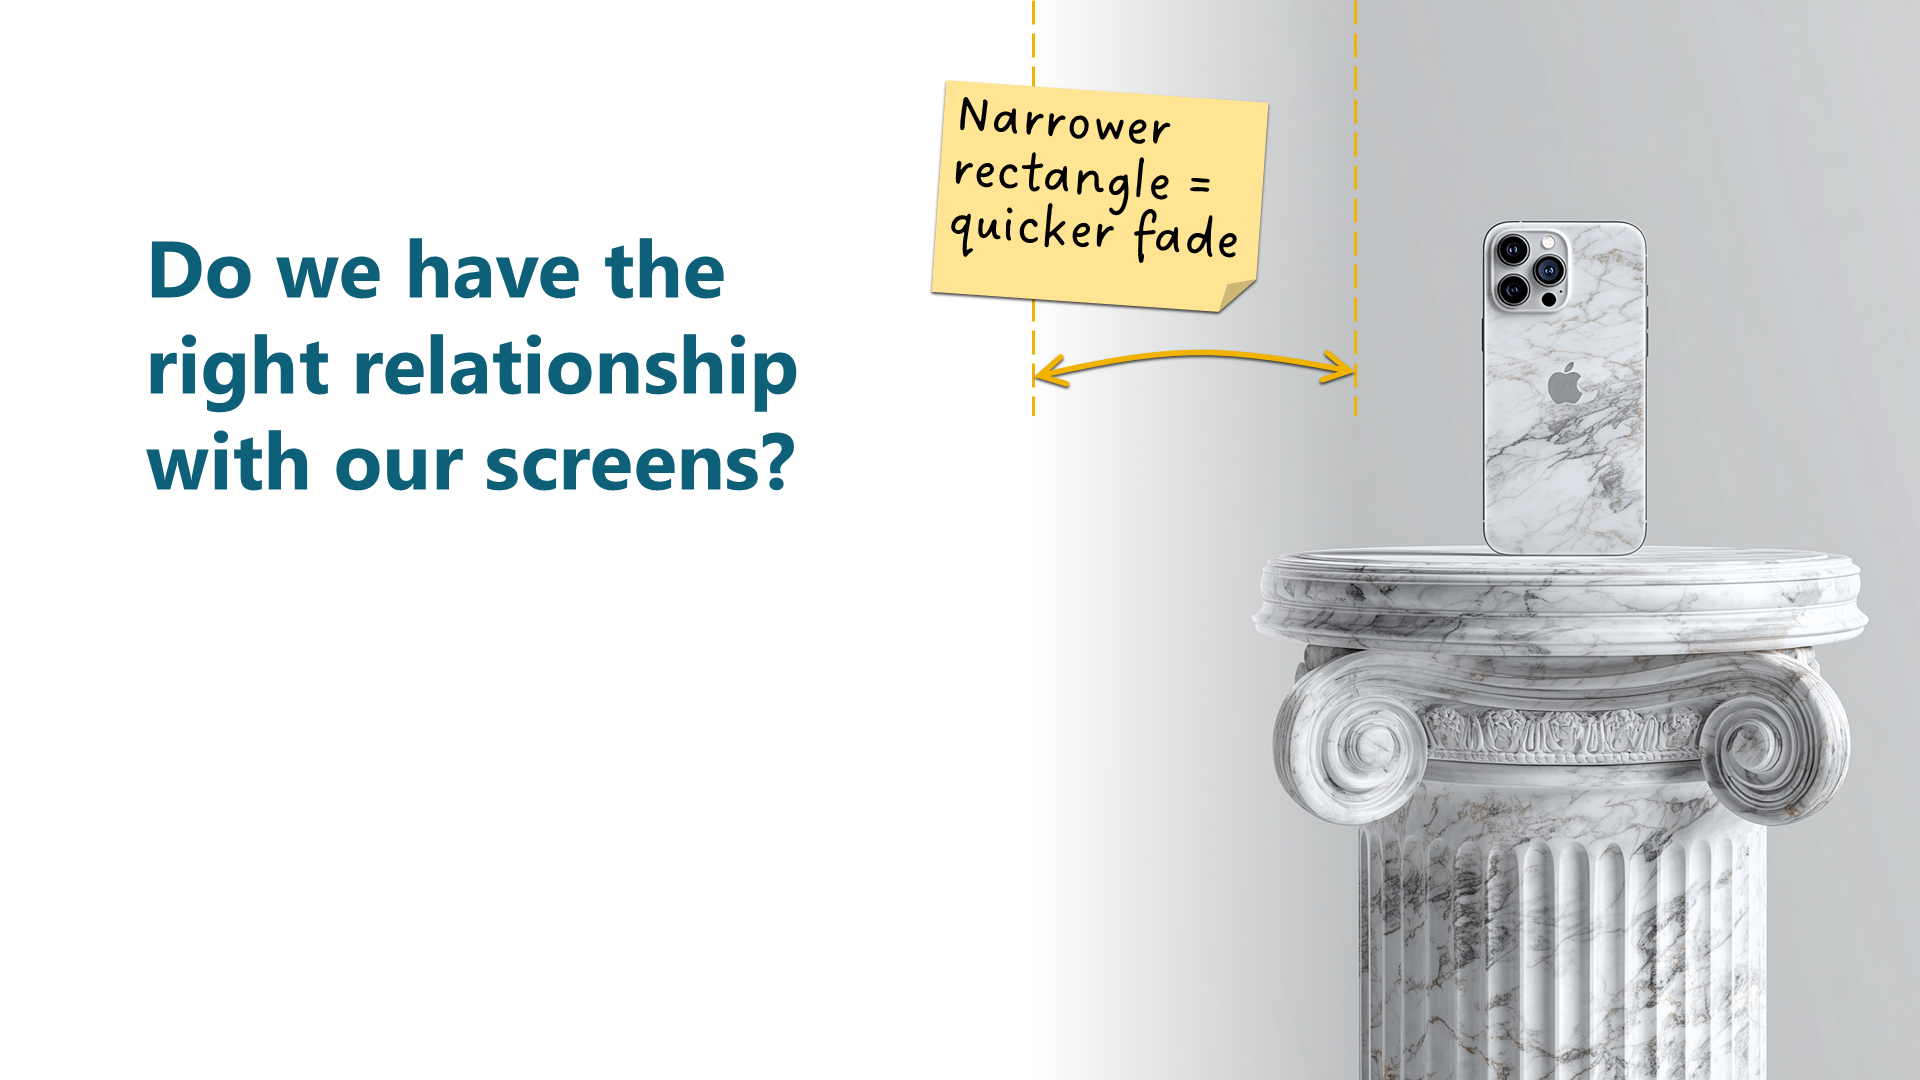
Step 3: Adjust the size of the blend
Now that you have your blend, you can adjust the size of the box to control where it starts. There’s no right or wrong answer here, but do think about the contents of the image, and perhaps avoid fading out the most important part of your picture too early.
But be aware that if you make the blend box too narrow, it will look a bit harsh.
No items found.
No items found.
No items found.
No items found.
No items found.
No items found.
No items found.
No items found.
No items found.
No items found.
Get THIS Download
Advanced tips
Try black-and-white
If your blend isn’t working that well on your photo, try converting it to black and white.
Select the image
Picture Format > Colour dropdown
Choose the first option on the top row. The tool tip will say Saturation: 0%
Blending all edges of a photo (not just one)
If you have an image that you want to place on a slide but not edge-to-edge, you may want to blend all the sides. To do this, use the same approach as above, with two differences:
First of all, make your blend rectangle exactly the same size as the image and align it perfectly
Second, change the gradient type to either Rectangular or Radial. Which one works best will depend on what’s in your photo.
If your images are not rectangular, then use the same shape to create the blend overlay and try setting the gradient type to Path.
Whichever one you use, be careful - these types of gradient often do not look great. I only really do this if I've got an image where the background isn't quite white, and I want to blend it into the background.
Including a blend in a template layout
[The following section is intended for people who know their way around slide master design. If you are struggling to make sense of this but want some help figuring it out – or just want to find out more about creating a better template for your team – please get in contact.]
If you are familiar with creating or amending layouts in the Slide Master, you might want to build the blend into some of your layouts. So that images put into placeholders automatically fade at the edge. While the approach is similar, there is one crucial difference.
If you just create a shape in a layout and place it over an image placeholder, PowerPoint will override that placement on any slides that use the layout. All placeholders are drawn on top of any static content (including your gradient rectangle) so the images will sit on top of the blend, hiding it. And you can’t just send the image behind the blend.
To get around this, on the layout, you have to add a custom placeholder and use that for the blend, formatting it in the same way as above. Some tips:
I usually use a table placeholder. And never a general content or a text placeholder. Because if you are switching from a different layout, PowerPoint may put content from existing placeholders in it. Which can confuse people. I’ve rarely seen table placeholders used in layouts, but if you do, then perhaps use a different type that you don’t use anywhere else in your template.
It is also worth changing the prompt text in the placeholder to something like “This placeholder is used to create the fade effect. Do not delete or insert anything in here.” That text will not appear in slide show or exports to PDFs or videos.
Be careful when creating any fades which would overlap with the Insert Picture button in the image placeholder – because if the fade box sits on top of the button, even if they can see the button through the transparency, users will not be able to click the button. So you will have to add instructions telling them to select the image and use the ribbon or the right-click menu. I recommend designing the layout differently.
Do you want to learn how to improve the quality of your documents so that they reflect the quality of your thinking? Talk to us to discuss how we can help.
And to accompany the course we have built a new Plan-on-a-page kit:
114 ready-built timelines to paste into your deck, each with custom drawing guides and pre-sized task shapes.
A 'sticker book' of useful shapes to help you quickly build clear, flexible and impressive plans that fit seamlessly into your stakeholder update decks


.jpg)
.png)

.png)